23.8.2012

Craft fair coming!

Nellin Shoppi is joining a craft fair Kädentaitomessut Helsinki in a bit over two weeks (8.9-9.9). I just decided that I want to take part in a fair and contacted them asking if there is any spots left. As it happened they had one 7 squaremeter spot and I took it. Bye bye lots of money for the spot! Also i got my friend to join me for the fair so it is more fun to sell and plan together!

 Now I am in the making of many, many and many more bookmarks for the fair. I will also make some jewelry. I was supposed to be able to work whole three weeks, but I got a really nice surprise!

I'm all about making the craft stand by hand because I can't afford to rent any suplies or tables... So I was looking for some inspiration:


Putinki contacted me and asked me to work for them because their graphic designer is sick and away for two weeks. Yesterday was my first day and it was a lot of fun. So now I have a little less time to work on my fair products but I will manage to make enough items, I am confident. It's just going to be a hard two weeks working evenings and weekends on top of a regular day job! 

I have also been offering my crafts to various places and so far I have gotten three resellers (YAAAY!):


Sorry for the short post today and thanks for reading! 

14.8.2012

How to get featured in blogs

How I got featured in blogs... How I got the idea about getting into some blogs came to me when I was featured in this blog and it brought me many views: Polymerionline

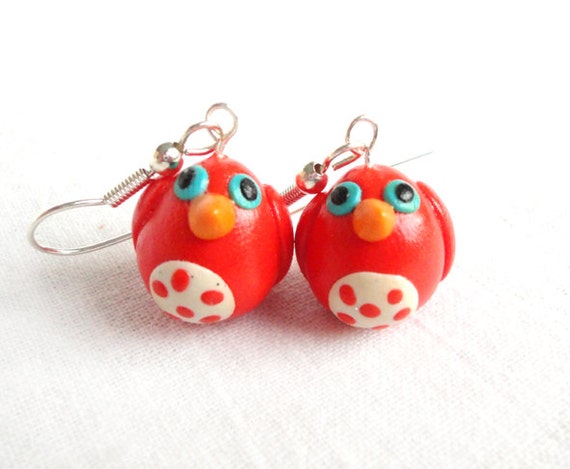
My featured item in polymerionline blog


So the last few weeks I have been working really hard to get some exposure in different blogs. Items in Nellin Shoppi are mostly ment for women and they're cute, whimsical and funny so I needed to find my target group (women). 


I started this project by searching the blog teams in Etsy because it is a good place to start!

I found and joined these teams:


I found many bloggers who are looking for a shop to feature without any costs. That means a free blog post about you and your shop, without any giveaway or ad space purchase. Still I think it is good to be a little picky about what kind of blog you want to be featured in. As a visual person I want my items to be featured only in blogs that I think look good. 


Here is a list of questions I got asked most. It is a good thing to think about these if you're planning to contact any bloggers.

- Background / Tell us a little about yourself
- What do you create/offer in your Etsy shop / What is your creative speciality
- When/How did you start your Etsy shop 
- Where do you find your inspiration 
- Any advice for people starting their own shop 
- Tell us about your creative process
- What is your favorite item and why
- Your other links (twitter, Fb, etc.)
- What is your next project
- Is Etsy your only job
- Are you attending any art shows
- What is your creative speciality


I contacted all the bloggers suitable for my needs via etsy convo. Most people answered within a day or two so it was very quick. They sent me questions and I could ask about their blog numbers and everything else I wanted to know. All of them are very nice people and most of them have their own Etsy shop too. I also decided to do one 20 dollar giveaway and one item feature in a little bit bigger blogs (but they're not out yet!). 

It's been about two weeks now and my shop has been featured in these blogs:


I am still waiting for some more blog posts and the giveaway and a review. My review item is already on it's way to Bulgaria. 

I am also interested in doing reviews and features, so if you're interested just contact me.


Thanks for reading my blog!
Nelli


13.8.2012

Peek into my studio

I think it is fun to peek into any artists studio and I decided to give you a peek into mine.

I make everything at home and I have many hiding places for my materials. Every crafty person knows how easy it is to collect a mountain of stuff to your home and enjoy every bit of it. I actually took out every pouch, box, string, button and envelope I have ever collected and decided to rearrange them. Basically it took me the whole day but it was totally worth it!

Enjoy the pictures:

My bookmarks. I packed them all in small plastic
 bags and made a  box for them after taking this picture.

I always have some items waiting to be packed on top of our terrarium.

I love this corner shelf and i use it to keep my glues and other small things in there. 

My next big project. These are huge polymer clay beads
that I will use to make one very big necklace.
Somehow I really like big show off necklaces!

I often sit on this bench in our balcony especially when I am sanding something. 

This is my kitchen table when I am having one of my 'let's clay up' -sessions!

My teddybears are cute and huggable.

I use these plastic bags for packing many things, like these bookmarks. 

A cat bookmark, brush and my waterproof lacquer.

I have a shelf with many small lockers in the kitchen. They're full of my materials etc.
And yes they're pizza taxi numbers on my fridge door... :D

This is how I pack my earrings for safe keeping. 

I use recycled yoghurt buckets for storing my polymer clay.
It is handy because  they have lids too and they stack nicely.


7.8.2012

Recycling catalogs and postcards

So the last few days I have been working on doing some envelopes, bookmarks and pillow boxes. They turned out really great and I will be using them to package items sold in Nellin Shoppi.  My mother brought me a bag of some old fashion catalogs, old postcards and all her remaining craft materials so I have plenty of new papers and scraps to use. 

First I started making bookmarks from her old postcards. I glued 3 pieces of postcard per one bookmark so they're very sturdy and will be good for a long time. These are not totally ready yet, as I will attach some strings and whatnot to them. I love how she had things like Spock from Star Trek, Old Metallica postcard, some old X-mas cards and artsy cards too. The price for one bookmark will be 5 euros + mailing cost. Here is how they look now:

Cards recycled to be bookmarks.
Still missing a few finishing touches.  Love the variety.
Including: Metallica, snowy forest, Spock, etc.

Santa!

I started making the envelopes from the catalog paper. I will mail all my bookmarks to customers in these lovely recycled envelopes. I actually opened one old envelope and drew my model from that. It was easy and fun making these envelopes and because the paper in the catalogs is very good quality, they make the perfect packages for my items. 

All the envelopes I made in one day. There's 50+ 

These are my favorites.

These are fun because there is a person in the picture. 

Also made some small envelopes to put my personal notes in
and coupon codes etc for the customers. 

Here is an example of how I will pack the bookmarks.
This one has a polymer clay cat bookmark inside. 


Then I wanted to make some pillow boxes that will fit my white A6 size cardboard box. I intend to use the pillow boxes to any jewelry that fits in them: mostly earrings. if it won't fit, then I will pack them to something else but I want to make pretty packaging for my customers. 


Stack of pillow boxes I made yesterday.

One of my favorite pillow boxes.

I also recycled my own test prints that I had saved up from making my printable cards.
They are perfect for these packages!


4.8.2012

How to make a polymer clay cat bookmark

Here is how I make my polymer clay cat bookmarks, step by step.


Materials and tools that you need to make this:

Polymer clay
Toothpick or similar stick
Baking paper (to cover surfaces)
Lacquer (I use waterproof lacquer that takes 30 minutes to dry)
Your choice paper (I used orange, pink and golden papers as in the picture above.)
1-1,5mm thick cardboard (2 pieces, one for molding the cat, other for the bookmark itself)
Super glue
Paper glue or Erikeeper 
Brush for the lacquer (and glue is you use Erikeeper)
Book (to help drying the cats)


For the cat you need polymer clay, wooden stick and some thick cardboard.


Make a ball out of polymer clay.  If the ball is too big, the cat will be fat
if it is too small then it will be harder to handle. 

Slowly make the ball longer and evenly thick.

Slowly bend the clay and make it longer, while keeping it evenly thick.


This is how it should look like now.

Pinch the ends of he clay with your fingers to make small legs for the cat. 


The legs should look like this.


Both side legs done. 


Now attach the cat to the cardboard and press the legs a bit so it
keeps the body still and stuck on the cardboard.

Measure a small ball of polymer clay that is the right size for the head.

Shape the head for the cat by hand. I like to keep them simple.

Use the stick to attach the head to make sure it sticks well.


Measure a tail for the cat. I like them quite long.


You can model the tail like this to see if it's a good size.


Shape the tail of the cat.


Use the stick again to attach the tail properly.

Remove the cat carefully from the cardboard and it is ready!
If you can't remove your cat from the cardboard, don't panic.
Put the cat in the fridge or freezer for a while (15min) and it will be easier to take off.

This time I made four cats. 


Bake the cats like it says in the polymer clay instructions.
 (I bake them for 30 minutes in 130 celsius)


I sand all my creations to remove the fingerprints and other marks I don't want  in the cats.


Sanding makes the polymer clay grey.

Difference between sanded and not sanded cat. 
After sanding the cats its time to put the lacquer on.  
You need a book, thick card board, brush and lacquer.

Use the cardboard when you paint the lacquer on so you don't leave fingerprints on the cat.
Put 2 or 3 layers of the lacquer to make it nice and shiny. 

Use the book to leave them dry like this.

This is how my four cats looked like after all the layers of lacquer. 


You need cardboard for the bookmarks, paper glue or Erikeeper
(I watered the erikeeper down about 50/50) brush,  your choice colored or patterned paper.
Put glue on one side of the cardboard and glue it to the paper. make sure
there's no wrinkles. Then cut out with scissors and make the other side too.

Use superglue to attach the cat onto the cardboard.

Done!

Thank you for reading my blog!
You can see more of my bookmarks and buy them here: